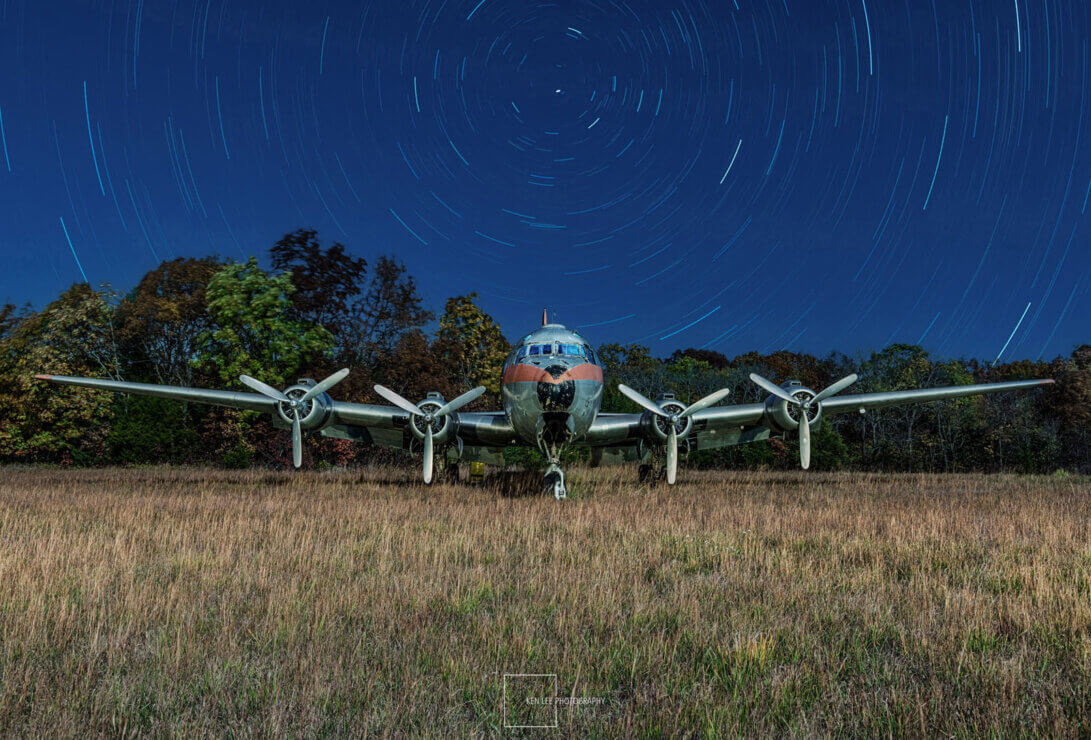
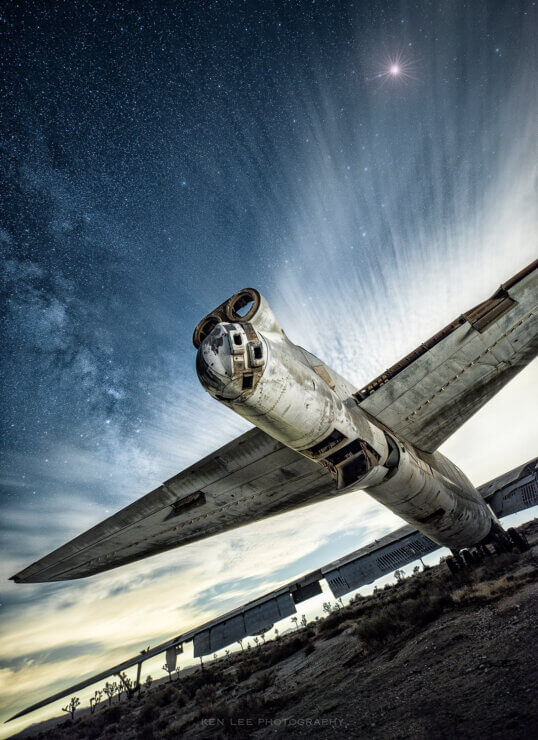
Light painting abandoned airplanes has some special challenges. Here’s how you can use a handheld light to illuminate an airplane in three easy steps.
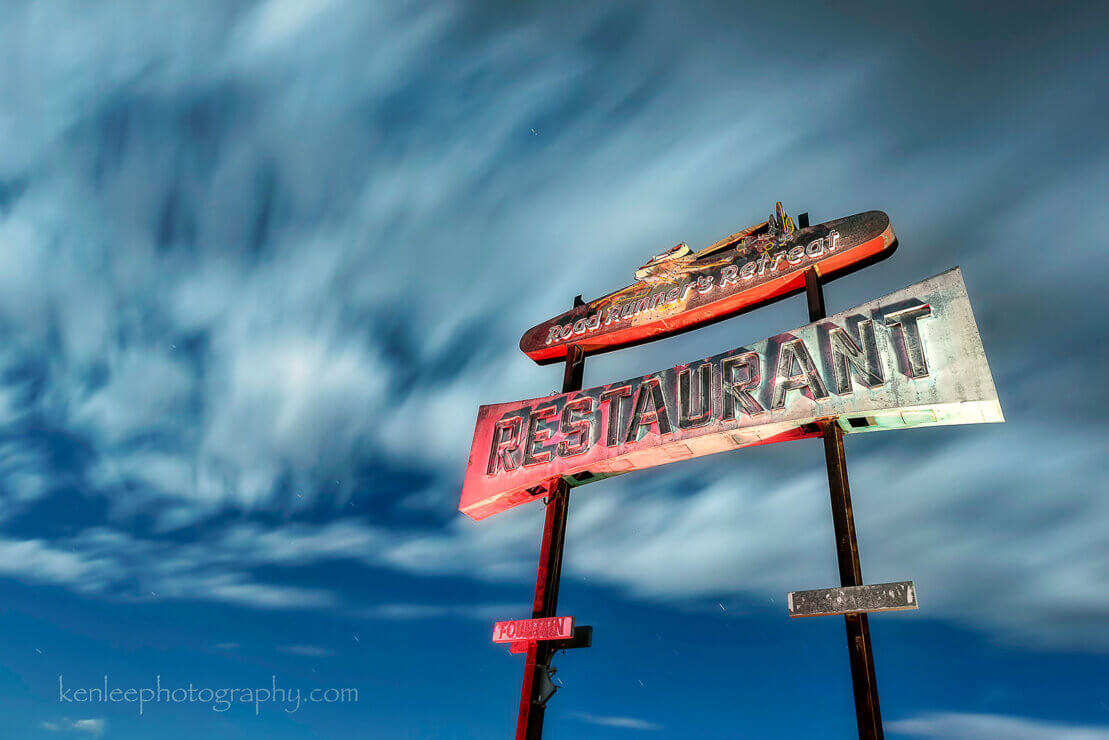
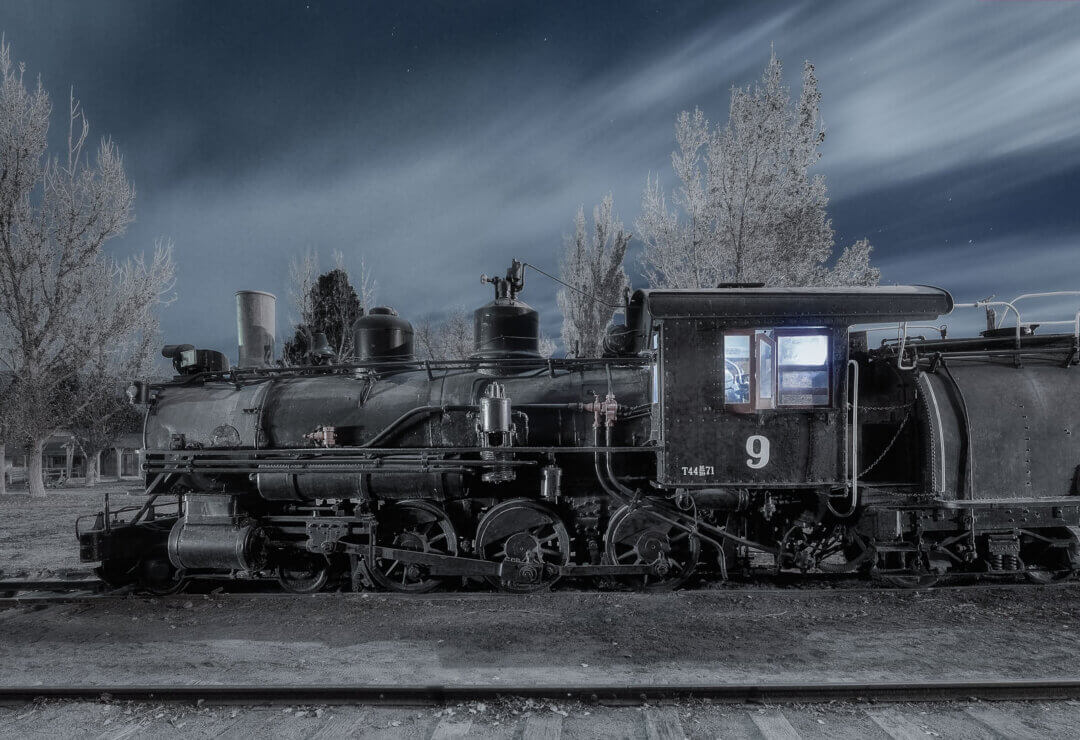
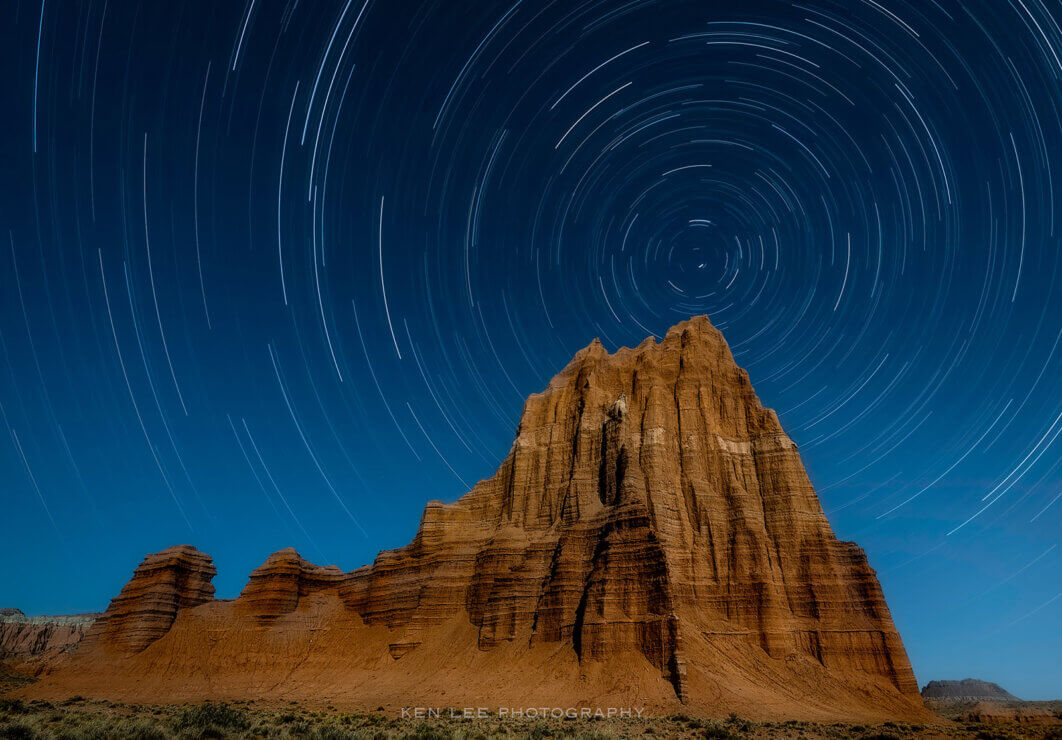
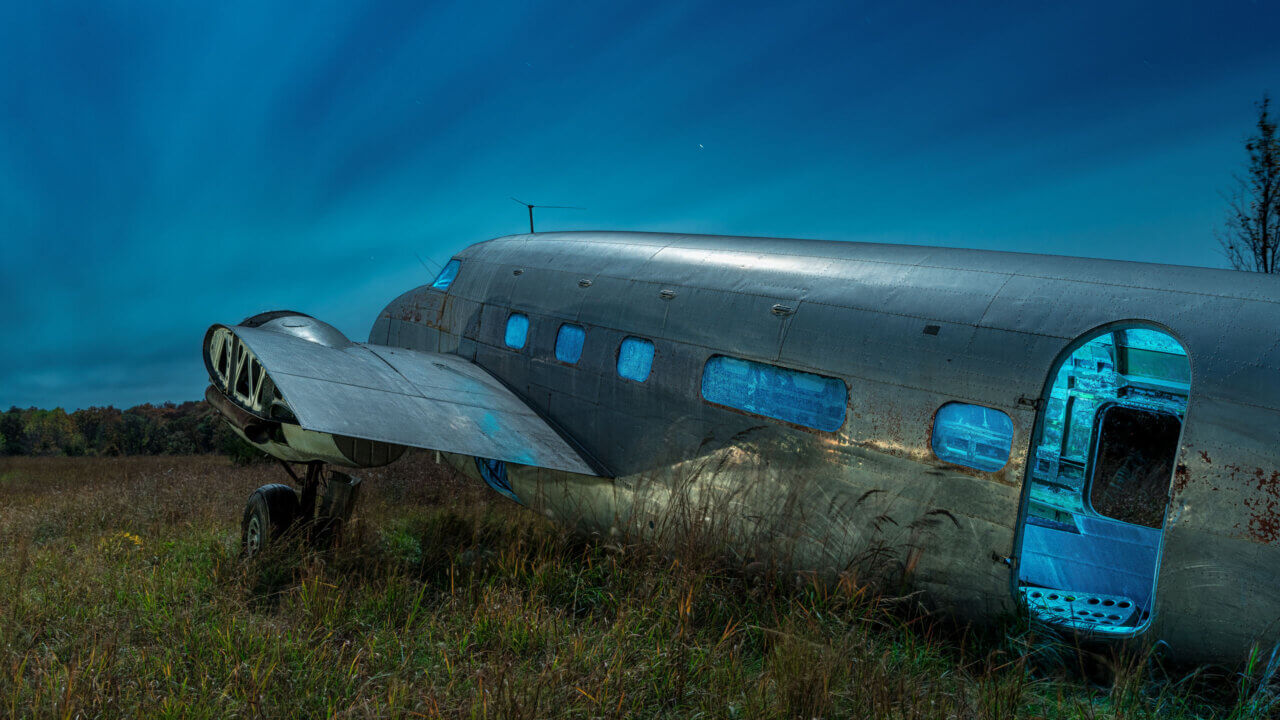
Although this was near a full moon, the clouds were moving in quickly. I wanted to capture some of the beauty of the incoming clouds. But I had to work quickly. Just two or three minutes after I took this photo, the entire sky was completely covered in thick clouds.
What is light painting?
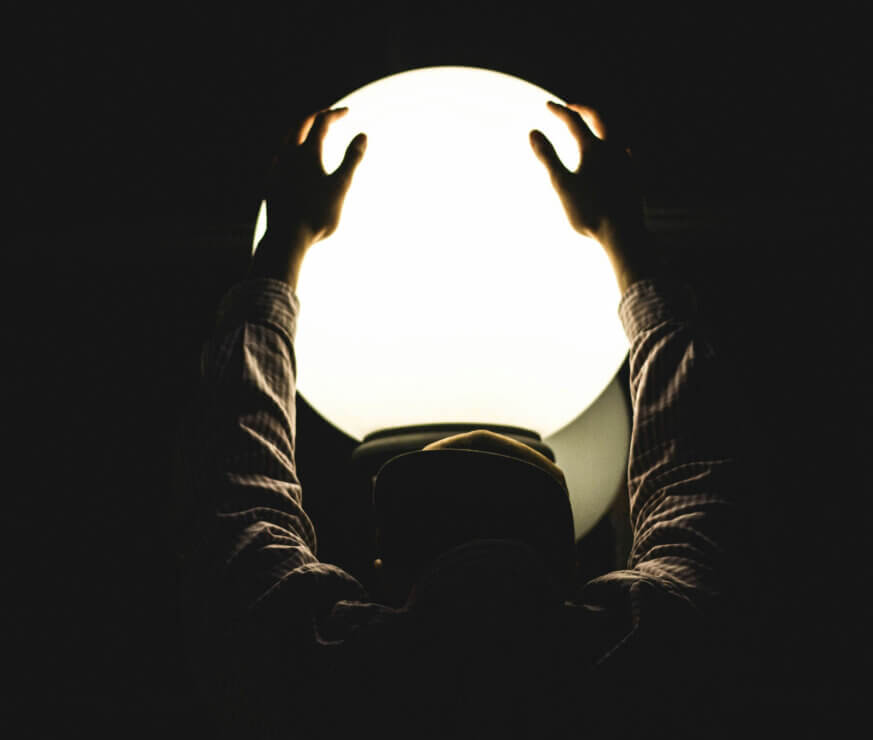
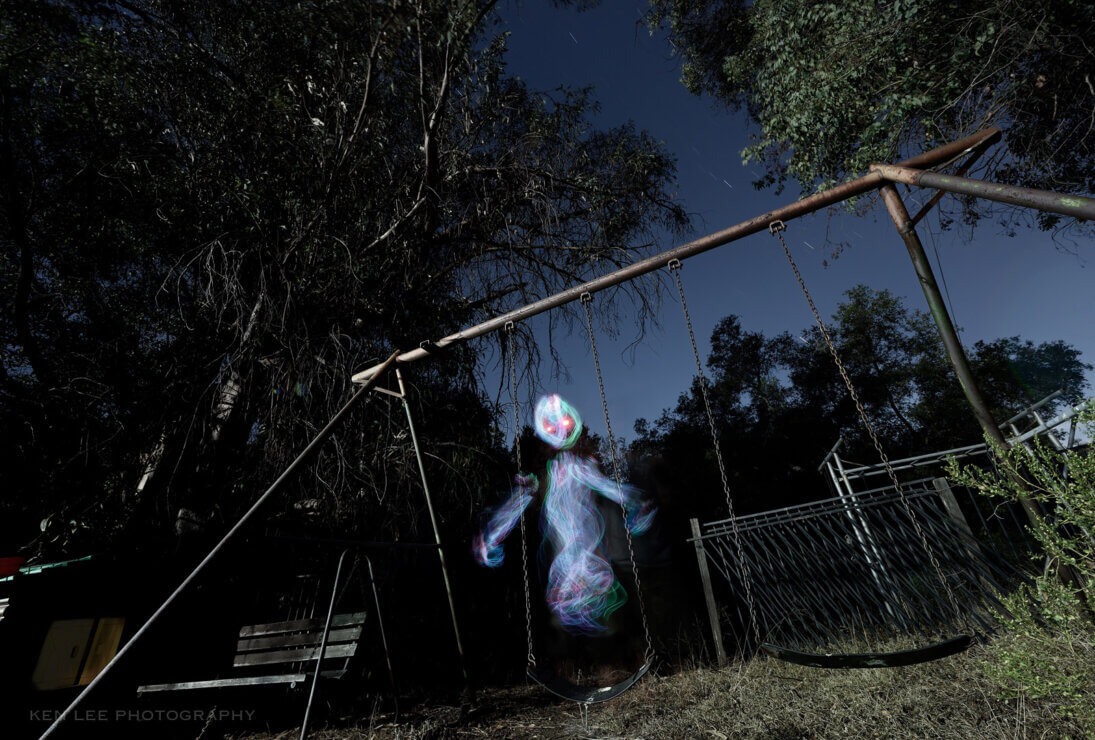
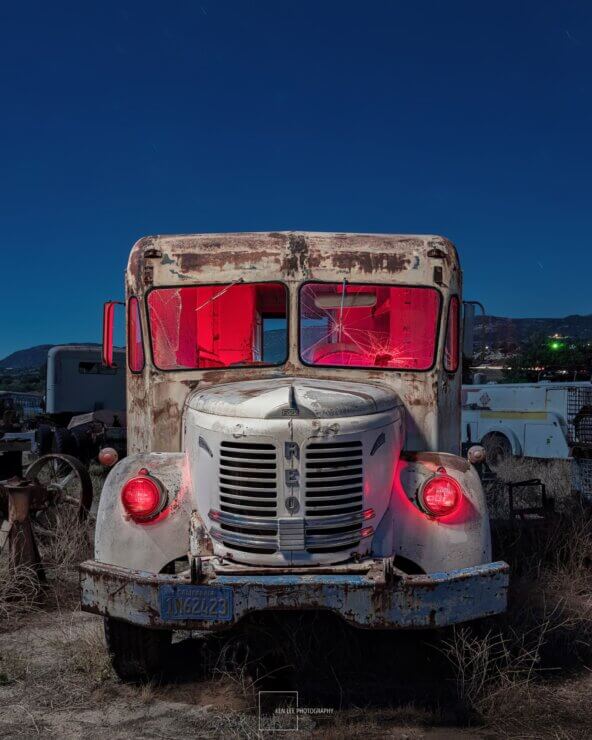
Light painting is a term that is often used loosely to describe any addition of light to a night photograph. Really, though, light painting is a technique that uses a handheld light source (or two!) to illuminate a scene during a long exposure.
To light paint, you set the camera on a tripod. Then, you open the camera shutter for a long time, sometimes for several minutes. While the shutter is open, you can walk around with a handheld flashlight and illuminate the scene. I use one that is capable of producing different colors. This process is called “light painting.” Why? Because you are using the flashlight as a paint brush, “brushing” on light instead of paint. During the exposure, all the light you shine on the subject is cumulative. Light painting to illuminate subjects is a beautiful, addictive art, as you can walk around the scene, deciding what to bring to light and what to keep in shadow. Night photographers have used this technique for over a hundred years!
Step one: The challenge of light painting a very reflective exterior
I wanted to illuminate the exterior of the plane with a warm white light to make it pop out more from the rest of the photo. However, it was very reflective. To avoid lots of white reflective spots, I stood to the left of the Lockheed Lodestar. I managed to get the plane a little brighter and bring out a little of the detail without a lot of reflections.
Step two: Light painting the interior of the airplane
I chose a teal-colored light, a color that Tim Little developed that looks beautiful in a variety of situations. Here, I thought it would also look slightly weird and mysterious.
If I had tried to use stationary LED panels or something similar to light up the interior, it would have taken quite a few panels to create illumination this evenly distributed throughout the interior. If I had used a single stationary LED panel, it would have been brighter in one area than the other.
Instead, I used a handheld light for light painting. To make it look natural, I held the light above my head and near the ceiling so it would not shine through the windows and create a streak. Then I simply walked toward the cockpit, shined the light into the cockpit, and then walked back, again holding the light above my head. The light was reflecting off the ceiling and on to everything else. This created an evenly distributed light that also looks like it is coming from the ceiling and shining below. With light painting, you don’t always have to shine your light directly on the surface. You can reflect the light instead.
Step three: Creating texture in the grassy foreground
I emerged from the plane. I then walked to camera left and “swept” a warm white light across the grass several times. Why? I wanted to create just a little bit of texture in the grass without making it really bright or detracting from the airplane.
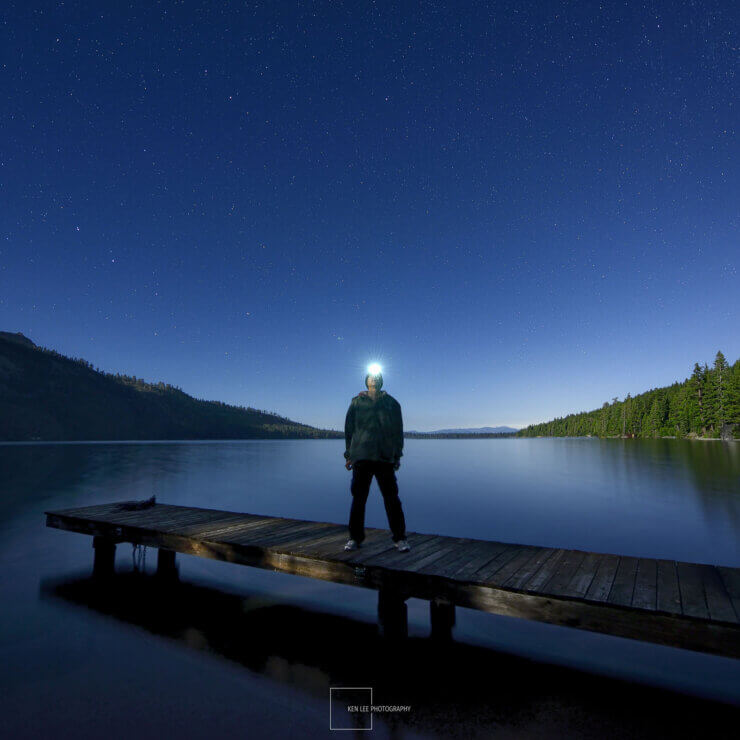
Why do you not show up in the photo when you are walking through the scene?
Great question. I turn invisible due to the long exposure of the photo. If you want to find out more, read this article about this amazing superpower of invisibility that night photographers have!
What can I use for handheld light painting subjects?
There are many handheld lights that you can use for light painting subjects. The most common is simply to use a flashlight, preferably an LED flashlight. I wrote an article that covers some of the best light painting tools, all the way from inexpensive to more expensive options.
You can also use an LED light panel, but instead of using it as a stationary light, simply handhold it. This is especially handy when you want to illuminate a large area evenly. I’ve been using a Lume Cube RGB Panel Pro 2.0 for handheld light painting.
If you want to illuminate a really large area evenly, you can even use an LED tube light or LED wand! I’ve used a Zhiyun LED light tube for this as well as other purposes.
Have fun and be creative!
Light painting is not a random affair, although it might sometimes feel like it at first. It might feel like trial and error at first, but good light painting can be very consistent and methodical while still being extremely creative. After all, you are choosing what to leave in shadow and what to illuminate, much like a movie producer.
If you have any questions about light painting subjects, I encourage you to leave them in the comments below.
VISIT ME, VISIT ME!
BOOKS AND PRINTS:
Head on over to the Ken Lee Photography website to purchase books or look at night photography and long exposure prints and more. My books are available there and Amazon, Barnes and Noble, Target, Booktopia, Books A Million, IBS, and Aladin. If you enjoy the book, please leave a nice review, thanks!
NIGHTAXIANS VIDEO YOUTUBE PODCAST:
Night photographers Tim Little, Mike Cooper and I all use Pentax gear. We discuss this, gear, adventures, light painting, lenses, night photography, creativity, and more in this ongoing YouTube podcast. Subscribe and watch to the Nightaxians today!
SOCIAL MEDIA:
Ken Lee Photography Facebook Page (poke your head in, say hi, and “like” the page if you would, uh, like)
Instagram
PODCAST:
Behind the Shot video podcast – interview February 2020
VIDEO PRESENTATION:
How We Got the Shots: Five Photographers, Five Stories – Night Photo Summit 2022
VIDEO INTERVIEW:
Ken Lee’s Abandoned Trains Planes and Automobiles with Tim Little of Cape Nights Photography
Conversation about night photography and my book with Lance Keimig of National Park At Night
ARTICLES:
A Photographer Captures Haunting Nighttime Images of Abandoned Buildings, Planes, and Cars in the American Southwest – Business Insider by Erin McDowell
A Photographer Explores Southern California’s Desert Ruins – Los Angeles Magazine article by Chris Nichols