I wanted to create a soft but detailed illumination on a couple of Joshua Tree photos. I’ll break down how I created this look in Joshua Tree National Park so you can do it in three easy steps!
A special place

I went into Joshua Tree National Park to take photos of, well, Joshua Trees. I often refer to JTNP as my spiritual home for night photography. This is where it began for me.
Cloudy with a chance of…?
However, the Clear Outside app called for close to 100% high clouds and about 60% middle clouds. These would largely obscure the moon. However, I was not going to stay away.
When I got there, sure enough, it was cloudy. But there was still some moonlight shining through, the clouds acting like Mother Nature’s largest softbox. Furthermore, the light diffused some of the glow from Coachella Valley and the moon, creating some interest. This could work!

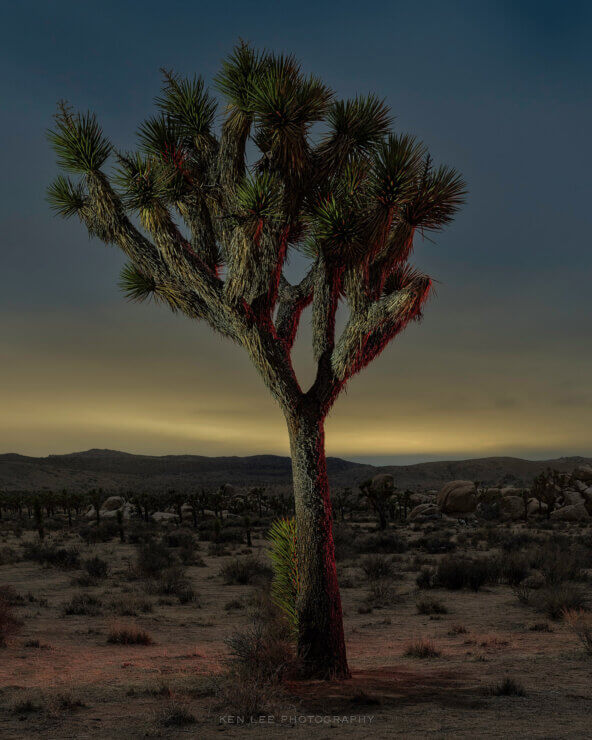
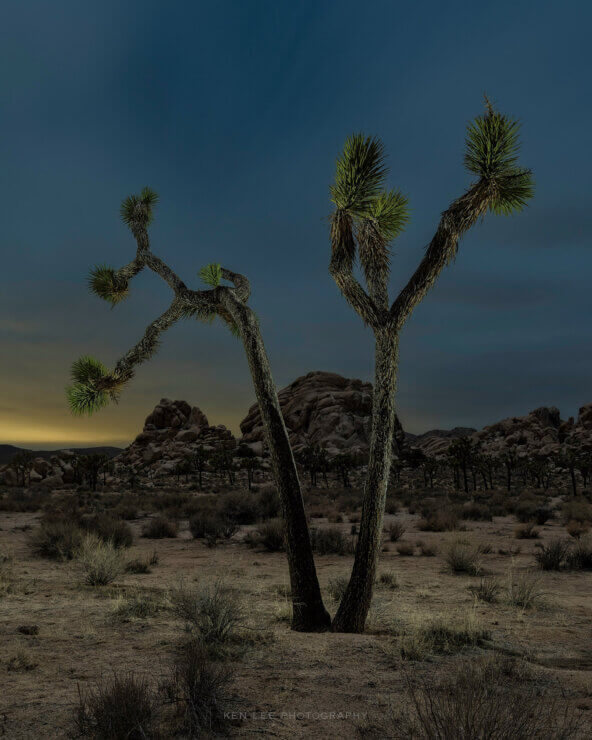
I decided that I wanted the light to almost seem like it was wrapping around the trees (well, they’re not really trees, but you know…). Here’s how I went about lighting the Joshua Trees in these two photos!
Step one
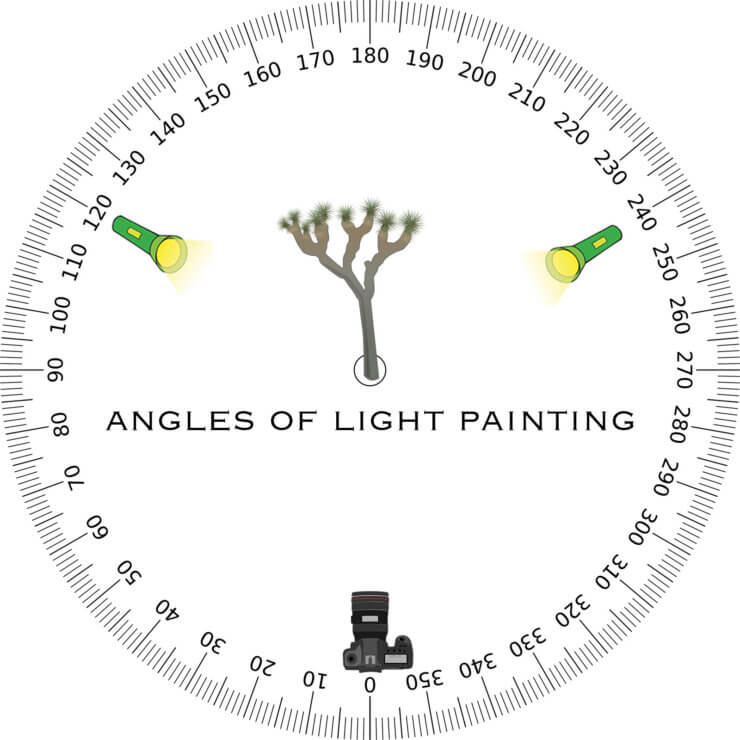
After focusing on the Joshua Trees in each of the photos, I lit the trees from the left side at 120 degrees to the camera with a warm white light. I stood about 20-25 feet away so the light would be really soft but still be detailed. I kept the handheld light, a ProtoMachines LED2, moving so there wouldn’t be any hot spots.
Step two
I then walked over to the other side of the tree. This time, I was at 240 degrees to the camera. Again, I was about 20-25 feet away to soften the light. For one of the photos, I decided to caress it with a little bit of red light, just for good measure.

Step three
I swept the ground with a warm white light for each of the photos, just to create a little bit more texture since the light was otherwise rather flat and dark.
Other details
For each of the photos, I used a Pentax K-1 Mk 1 camera with a 28-105mm f/3.5-5.6 zoom lens. The settings were two minutes f/8 ISO 200. I kept the ISO low so I had enough time to walk around and light the trees, but also so I could use a slightly dimmer light from farther away to keep the lighting soft while still retaining details.
These Joshua Trees have an enormous amount of character. Keeping the detail is often very important to me so it retains their personality.
I’ll add that these photos were taken one right after another without any attempts!! Niiiice!
I wanted to create a soft but detailed illumination on a couple of Joshua Tree photos. I’ll break down how I created this look in Joshua Tree National Park so you can do it in three easy steps!
A special place
I went into Joshua Tree National Park to take photos of, well, Joshua Trees. I often refer to JTNP as my spiritual home for night photography. This is where it began for me.
Cloudy with a chance of…?
However, the Clear Outside app called for close to 100% high clouds and about 60% middle clouds. These would largely obscure the moon. However, I was not going to stay away.
When I got there, sure enough, it was cloudy. But there was still some moonlight shining through, the clouds acting like Mother Nature’s largest softbox. Furthermore, the light diffused some of the glow from Coachella Valley and the moon, creating some interest. This could work!
I decided that I wanted the light to almost seem like it was wrapping around the trees (well, they’re not really trees, but you know…). Here’s how I went about lighting the Joshua Trees in these two photos!
Step one
After focusing on the Joshua Trees in each of the photos, I lit the trees from the left side at 120 degrees to the camera with a warm white light. I stood about 20-25 feet away so the light would be really soft but still be detailed. I kept the handheld light, a ProtoMachines LED2, moving so there wouldn’t be any hot spots.
Step two
I then walked over to the other side of the tree. This time, I was at 240 degrees to the camera. Again, I was about 20-25 feet away to soften the light. For one of the photos, I decided to caress it with a little bit of red light, just for good measure.
Step three
I swept the ground with a warm white light for each of the photos, just to create a little bit more texture since the light was otherwise rather flat and dark.
Other details
For each of the photos, I used a Pentax K-1 Mk 1 camera with a 28-105mm f/3.5-5.6 zoom lens. The settings were two minutes f/8 ISO 200. I kept the ISO low so I had enough time to walk around and light the trees, but also so I could use a slightly dimmer light from farther away to keep the lighting soft while still retaining details.
These Joshua Trees have an enormous amount of character. Keeping the detail is often very important to me so it retains their personality.
I’ll add that these photos were taken one right after another without any attempts!! Niiiice!
VISIT ME, VISIT ME!
BOOKS AND PRINTS:
Head on over to the Ken Lee Photography website to purchase books or look at night photography and long exposure prints and more. My books are available there and Amazon, Barnes and Noble, Target, Booktopia, Books A Million, IBS, and Aladin. If you enjoy the book, please leave a nice review, thanks!
SOCIAL MEDIA:
Ken Lee Photography Facebook Page (poke your head in, say hi, and “like” the page if you would, uh, like)
Instagram
PODCAST:
Behind the Shot video podcast – interview February 2020
VIDEO PRESENTATION:
How We Got the Shots: Five Photographers, Five Stories – Night Photo Summit 2022
VIDEO INTERVIEW:
Ken Lee’s Abandoned Trains Planes and Automobiles with Tim Little of Cape Nights Photography
Conversation about night photography and my book with Lance Keimig of National Park At Night
ARTICLES:
A Photographer Captures Haunting Nighttime Images of Abandoned Buildings, Planes, and Cars in the American Southwest – Business Insider by Erin McDowell
A Photographer Explores Southern California’s Desert Ruins – Los Angeles Magazine article by Chris Nichols
